
The making of icons was very complicated and consists of some operations fulfilling by masters of different specialities.
Traditional material for icons in Russia was a lime-board. In the 18th century they began to paint icons on cypress board, but it was very rare done from the whole cypress. They usually made it of two layers cypress and lime. They painted on the lime board and cypress was for protection of warp, moisture and insects. Joiner made a board, he did it with the help of special plane which made some furrows on the surface on the place where painting would be.
The next specialist made the upper. He put on that furrow surface glue canvas. After drying it was primed by liquid alabaster, so that the surface must be pock. Then it was dried again at room temperature. Then they put a layer of glue mixed with alabaster (levcas). It was repeated three times. Every time it was dried. Since 19th century the method remained but the substance was changed to chalk upper. It was softer and the gold chasing was more convenient to make.
The next operation was cleaning the primed surface. Usually it was done by the some specialist but every painter could do it as well. The surface was watered and polished by pumice-stone. Then the board was dried and smoothed by flannel.
Clean flat dead surface of board was used for painting now. The master drew by pencil first, then the contour was scratched.
The next operation was a gold work. The places where gold must be put were covered by poliment first. Then it was dried and polished by cloth. The operation was repeated thrice. Poliment was used for fastness of golden layer and for preventing of seeing whiteness of prime. They used leaf gold.
The gold was put on the suede pillow and was cut by the knife in such a way as to be it enough for the whole surface. The surface where the gold should be put was wetted by mixture of water and vodka. Then the gold was put on the surface by squirrel fan brush buttered. The process was ended by dog or wolf tooth polishing.
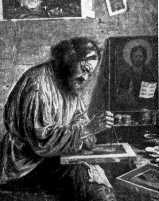
Then after gold work the next master painted landscape figures and everything around the saint's face. The next master painted the saint's face and the parts of his figure. Before the 18th century they painted by egg colours. Since the 18th century they had begun to paint by oil-paint as well.
The egg colours were prepared by the following way. They tried to take a spoiled egg where there was a process of decomposition. They took only yolk put it on the palm and cleared it out of white. The yolk was pricked and put into the clean shell and then it was filled with kvass (later by the solution of vinegar). Everything was mixed and put into a bottle and corked up. Emulsion was ready. Then in the old wooden spoon there were put dry pigment and poured the emulsion there. Everything was mixed by finger. The ready pigment was covered by water. During two days there was on a chemical reaction, the pigment became stronger. The process of decomposition began. Egg-colours became dry very quickly and they were not washed away. They became stronger in time. The sun rays didn't spoil them. That's why they had value for icon-painting and fresco.
Sometimes the masters used both oil-paint and egg-colour. The first was used for preparatory works the second was used for effect in vividness and decorative processing.
So the next operation began. The next specialist - master outlined the face in white lead and put the local tone, scratched it and shaded by soot. The future face was covered by special light yellow prime (sankire). In the places where the colours should be light it was marked by white. Then it was given a volume. The colours were applied in strict succession. The work required extreme care and precision. Beginning with the 19th century the painting of the face had been fulfilled in another manner.
The final work with icon was processing the background, decorating gold surface by enamel. The chase was done after having painted the icon. The chase was done by one more specialist. Then the master signed the article and did the necessary calligraphic legends.
Only after that the icon was lacquered. On the surface of the article (icon) there was poured some drying oil and it was left for 2-3 hours. Then the superfluous part was taken away. They needed the oil for keeping the colours from air and sun rays. It made the icon more colourful.